Affiliate Disclosure: ToolShedTested is reader-supported. When you buy through links on our site, we may earn an affiliate commission at no extra cost to you.
How to Build a Deck with Power Tools -- Complete 2026 Guide
I built my first deck as a 24-year-old apprentice on a job in suburban Ohio. We framed it in a day and a half, laid the boards in another day, and the homeowner cried when she saw it finished. That stuck with me.
Fourteen years of residential construction later, I still think deck building is one of the best DIY projects a homeowner can take on. The structural concepts are straightforward, the material costs are predictable, and the payoff -- both in usable outdoor space and home value -- is immediate. You don’t need to be a carpenter. You need the right tools, a solid plan, and enough patience to do each step correctly before moving to the next one.
This guide covers both -- the exact tools you need to build a deck, and the step-by-step process that actually works in the field. I’m not going to bury you in framing theory. I’m going to tell you what I’d tell a homeowner who just bought a new house and wants to build a 12x16 attached deck before summer.
The Tools You Need to Build a Deck
Let’s be direct: you can build a deck with a circular saw and an impact driver. Everything else makes the job faster, cleaner, and less frustrating. Here’s the full kit I’d assemble before breaking ground.
1. Miter Saw
A miter saw is the workhorse of framing and finish cuts. You’ll use it for crosscutting deck boards to length, cutting framing lumber square, and trimming stair stringers. On a railing system, you’ll be making a lot of 45-degree cuts on cap rails and post tops -- a miter saw handles those in seconds where a circular saw makes them a chore.
What to look for: A 10-inch sliding compound miter saw gives you the crosscut capacity to handle 2x12 stair stringers in one pass. Dual bevel is nice for complex railing angles but not required for a basic deck. Look for a laser guide or LED shadow line -- they make repetitive cuts significantly more accurate. Positive stops at common angles (45, 22.5) matter more than you’d think when you’re cutting 40 railing balusters.
See our full miter saw buying guide for 2026 -- we tested six models for cut accuracy and bevel repeatability.
2. Circular Saw
Your miter saw can’t rip boards down to width -- that’s what the circular saw is for. You’ll use it for ripping a deck board to fit the final course against the house, cutting plywood for stair landing pads, and any cut too long or too awkward to run through a miter saw. On a standard 12x16 deck, you might make 20 to 40 circular saw cuts before you’re done.
What to look for: A 7-1/4 inch corded saw is my first choice for a deck build -- the continuous runtime matters when you’re on a hot job site ripping through treated lumber all day. A worm drive delivers more torque through wet pressure-treated wood. Cordless works fine for a one-time DIY project; just have a spare battery ready. Blade choice matters: use a framing blade for rough cuts and swap to a 40-tooth finish blade when you get to the deck boards.
Read our circular saw reviews -- 6 models tested for cutting speed and accuracy
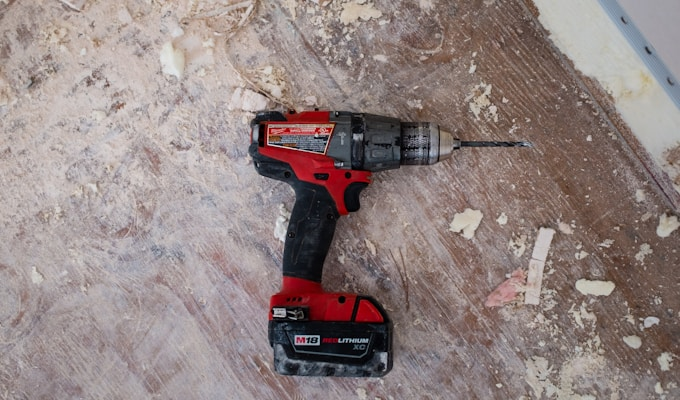
3. Impact Driver
This is the most important power tool on a deck build. Full stop. You will drive hundreds -- sometimes over a thousand -- deck screws into pressure-treated lumber. A standard drill will bog down, strip heads, and wear you out. An impact driver punches through 3-inch deck screws like they’re nothing. It also drives lag bolts and structural screws into ledger connections where you need real torque.
What to look for: 18V or 20V brushless motor -- brushless gives you noticeably better runtime and longevity. Look for at least 1,500 in-lbs of torque. A variable speed trigger and multiple drive modes matter when you’re driving into hardwood composite versus soft pine -- you want control so you don’t overdrive screws and blow out the surface. A belt clip is a quality-of-life feature you’ll appreciate after climbing up and down a ladder 50 times.
See our top impact driver picks for 2026 -- tested for torque, speed, and value
4. Cordless Drill
You need a drill alongside the impact driver -- they do different jobs. The drill handles pilot holes (critical in hardwoods and near board ends to prevent splitting), mixing concrete for footings, and installing hardware like post caps and joist hangers with self-tapping screws that don’t benefit from impact action. Keep both on your belt. Swapping bits constantly on one tool is how you slow down.
What to look for: Match battery platforms with your impact driver if possible -- running one battery system simplifies your kit. A half-inch chuck handles the large bits you’ll need for drilling through ledger boards and setting post hardware. A keyless chuck is table stakes at this point. Variable speed and a clutch matter for hardware installation where you need to feel torque rather than just punch through.
Our cordless drill roundup -- 7 picks tested for power, speed, and runtime
5. Jigsaw
The jigsaw handles the cuts you can’t make with a circular saw or miter saw -- notching deck boards around posts, cutting curves on decorative fascia boards, and trimming stair stringers to fit a landing pad. On a basic deck build you might only use it a dozen times, but those cuts require a jigsaw and nothing else will work.
What to look for: Variable orbital action gives you aggressive cutting through framing lumber and a finer action for finish cuts in deck boards. A tool-free blade change is worth paying for -- you’ll swap blades often between a demolition blade for treated lumber and a fine-tooth blade for composite decking. A base plate that locks at 45 degrees handles most bevel cuts you’ll encounter.
6. Speed Square and Chalk Line
These aren’t power tools but they control whether everything else goes right. A speed square keeps your framing cuts square and doubles as a saw guide for short crosscuts in the field. A chalk line lays out post hole locations, board spacing, and keeps your deck board courses running parallel over a long run. Don’t skip these -- eyeballing layout is how you end up with wavy boards and posts that are six inches off from where they need to be.
What to look for: A 7-inch aluminum speed square (Swanson is the standard) is the one to get. For chalk line, get a self-retracting model and use blue chalk -- red stains pressure-treated wood permanently and you’ll see it through your finish.
7. Random Orbital Sander
You’ll use this at the end of the build on rail caps, stair treads, and any deck boards that need easing before finish. Sanding rail caps before sealing is not optional if you don’t want your guests walking away with splinters. A random orbital leaves a much cleaner surface than a belt sander and won’t leave swirl marks across the grain the way a disc sander will.
What to look for: A 5-inch random orbital with a dust bag or port handles everything you’ll encounter on a deck. Variable speed lets you run slower on softwoods where an aggressive 12,000 OPM will scuff the surface. Cordless is convenient for working around a rail system -- you’re not managing a cord at waist height while sanding spindles.
See our random orbital sander reviews -- 7 models tested for smooth, swirl-free results
How to Build a Deck: Step-by-Step Overview
This is not a full structural engineering manual. It’s the sequence of operations and the decisions that matter at each stage. Work in this order and you won’t find yourself tearing out completed work.
Step 1: Planning and Permits
Before you touch a shovel, get your permit. I know -- nobody wants to hear that. But an unpermitted deck can create real problems at sale, and inspectors catch ledger connections and footing depth for good reason. Most jurisdictions require a site plan showing deck dimensions, post locations, ledger connection method, and footing depth. Your local building department website usually has a checklist. Pull the permit, schedule the footing inspection before you pour, and the rest goes smoothly.
While you’re in the planning phase: determine your decking material (pressure-treated pine, cedar, or composite), calculate your material list, and dial in your post spacing based on your beam span tables. Overbuilding the frame is cheap insurance.
Step 2: Laying Out Post Locations
Accurate layout is everything. Use batter boards and string lines to establish the perimeter of your deck and locate post centers before you dig. The 3-4-5 triangle method (or a 6-8-10 version for larger layouts) gives you a perfect 90-degree corner. Check diagonal measurements -- if both diagonals are equal, your layout is square. Get this right before you dig a single hole.
Step 3: Setting Posts and Footings
Dig your footing holes below your local frost line -- your permit inspector will check this. Tube forms keep the concrete clean and provide the right bearing diameter. For most residential decks, set your post anchors in the wet concrete rather than burying the post itself. This keeps wood out of the ground and dramatically extends post life. Use a level on two faces while the concrete is still wet and brace your forms before you walk away.
Step 4: Installing Beams and Joists
Set your beams on the post caps and check that everything is level across the span before you fasten anything permanently. Your ledger board connects the deck frame to the house rim joist -- this is the most critical structural connection on the deck. Use lag screws or structural screws, not nails, and stagger them per your code. Install joist hangers at consistent spacing (typically 12 or 16 inches on center) and use the specified joist hanger nails -- regular nails in a hanger are a code violation and a structural failure waiting to happen.
Step 5: Laying Deck Boards
Start from the house and work out. Snap a chalk line along the ledger to keep your first course perfectly parallel -- if that course wanders, every board after it wanders. Use a consistent spacer between boards. I keep a box of 16d nails on the job for this -- they give you about a 3/16-inch gap which is right for most pressure-treated pine. For composite decking, follow the manufacturer’s spacing spec exactly since composites expand and contract more than wood.
Drive two screws per joist crossing on each board, about an inch from each edge. Pre-drill near board ends every time -- splitting a board end on your last course of decking is a miserable experience.
Step 6: Cutting to Length
Let your deck boards run wild past the outer rim joist, then snap a single chalk line at your final overhang dimension and cut them all in one pass with the circular saw. This gives you a perfectly straight, clean edge that you couldn’t achieve by cutting each board individually during installation. Use a straightedge clamped to the boards as a saw guide if your circular saw doesn’t track true freehand.
Step 7: Building Railings
Post spacing drives your railing design -- most codes require posts no more than 6 feet apart for 36-inch or 42-inch railings. Bolt your posts to the rim joist or the decking frame directly rather than surface-mounting to the deck surface -- a surface-mounted post will wobble under load no matter how many bolts you use. Install your top and bottom rails, then cut and space your balusters. A simple spacer block cut to your baluster gap width speeds this up enormously and keeps spacing consistent across the whole run.
Step 8: Sanding and Finishing
Sand rail caps and stair treads before applying any sealer or stain. For pressure-treated pine, let the deck dry for at least 30 days before applying a penetrating finish -- wet treated wood won’t absorb it properly. For composite decking, follow the manufacturer’s guidance. Apply a UV-blocking penetrating stain or sealer for wood decks. A good finish extends the maintenance cycle significantly and keeps your deck looking new well into year three.
Pro Tips from the Field
- Buy 10% extra material. Pressure-treated lumber from a home center has more bows, crowns, and defects than you expect. Culling bad boards is part of the process. Running out of material mid-build costs you a half-day trip and breaks your rhythm.
- Crown your joists up. Every piece of dimensional lumber has a slight bow -- lay it crown up when you install it. The deck load flattens it out over time. Install it crown down and it sags.
- Use structural screws, not nails, for hardware. Joist hanger nails are the exception. But for ledger bolts, post cap connections, and beam-to-post attachments -- structural screws like LedgerLOK or structural lag screws are faster, stronger, and easier to install correctly than through-bolts in most residential deck applications.
- Pilot holes near ends and edges -- always. This is not optional. Splitting a board six inches from the end of a run means cutting it short or replacing it. Takes 10 seconds to drill the pilot hole.
- String a dry run of your first deck board course before fastening anything. It’s the fastest way to catch a layout problem before it’s permanent.
Common Mistakes DIYers Make
- Skipping the permit. It creates a real problem at sale or refinance and inspectors check ledger connections and footing depth specifically because those are the two failure points in most DIY decks. Pull the permit.
- Undersizing footings or not getting below frost depth. A deck that heaves every spring is a deck that destroys its ledger connection over time. Get below frost. Check your local code for the minimum depth -- it varies significantly by region.
- Using a regular drill instead of an impact driver to drive deck screws. You’ll strip heads, fatigue your wrist, and bog down constantly in wet treated lumber. The impact driver exists specifically for this application. Get one before you start.
- Not pre-drilling near board ends. Treated pine at the end of a board will split under almost any screw without a pilot hole. This ruins deck boards and looks terrible. Always pilot drill within 6 inches of a board end.
Frequently Asked Questions
How long does it take to build a deck?
For a 12x16 attached deck, plan on 3 to 5 days of actual work time for one person who’s handy but not a professional. That breaks down roughly as: one day for footings and posts (including concrete cure time), one day for framing, one to two days for decking, and one day for railings and finishing. Weather, permit inspections, and material delivery can all add time. Two people makes the framing and decking stages significantly faster.
Do I need permits to build a deck?
In most jurisdictions, yes -- especially for any deck over 30 inches off the ground or attached to the house. The threshold varies by city and county, but the permit protects you. An unpermitted deck that doesn’t comply with structural code can complicate home sales and homeowner’s insurance claims. Check with your local building department before you start.
What’s the best wood for a deck?
For a budget-conscious build, pressure-treated pine is the practical answer -- it’s widely available, dimensionally consistent, and holds up well when properly finished. Cedar is a step up in look and workability but costs more and still needs finishing. For a low-maintenance deck that doesn’t need sealing every year, composite decking (Trex, TimberTech, Fiberon) is worth the premium if your budget allows. Composite costs more upfront but requires significantly less maintenance over 10 to 20 years.
Can one person build a deck?
Yes -- I’ve done it. But a few stages are genuinely easier with a second set of hands: setting posts plumb while concrete cures, lifting beams onto post caps, and installing long deck boards that want to bow. If you’re building solo, use temporary bracing for posts and work with shorter lumber lengths where possible. Plan your work sequence so you’re not trying to hold something and fasten it at the same time.
Related Reading
- Best Power Tools for Deck Building 2026: 6 Essential Tools Tested
- Best Miter Saws 2026: Top Picks for Framing, Trim, and Finish Work
- Best Circular Saws 2026: 6 Models Tested for Cutting Speed and Accuracy
- Best Jigsaws 2026: Top Picks for Curves and Cutouts
- Best Impact Drivers 2026
- Corded vs Cordless Power Tools: Which Should You Buy in 2026?